In my quest to repair the motor in my Siemens washing machine I have stripped the machine down and got access to the motor but have experienced some problems in getting the new brushes in. This is for two reasons: the first is that I have not removed the motor, and the second is that the pattern parts I have bought don’t fit properly.
Most of the instruction videos out there do suggest removing the motor but I had tried without, and whilst this may at least in theory be possible I would not recommend it. There are lots of videos out there which show you how to remove the motor, such as this one:
The key insight here is to put the machine on its side, rather than (as I had done up to now) on its back. You need to remove a panel on the back of the machine, and you can then reach inside and undo two 10mm bolts. This is best done with a ratchet or normal spanner, as there isn’t much clearance between the back of the machine and the bolt head. However I did use a socket to get it going. You also need to remove the belt from the drum and the motor spindle.
Once the bolts are out, the motor is still held pretty firmly on several plastic lugs. On this picture you can see the socket on the right hand side of one of the bolts.
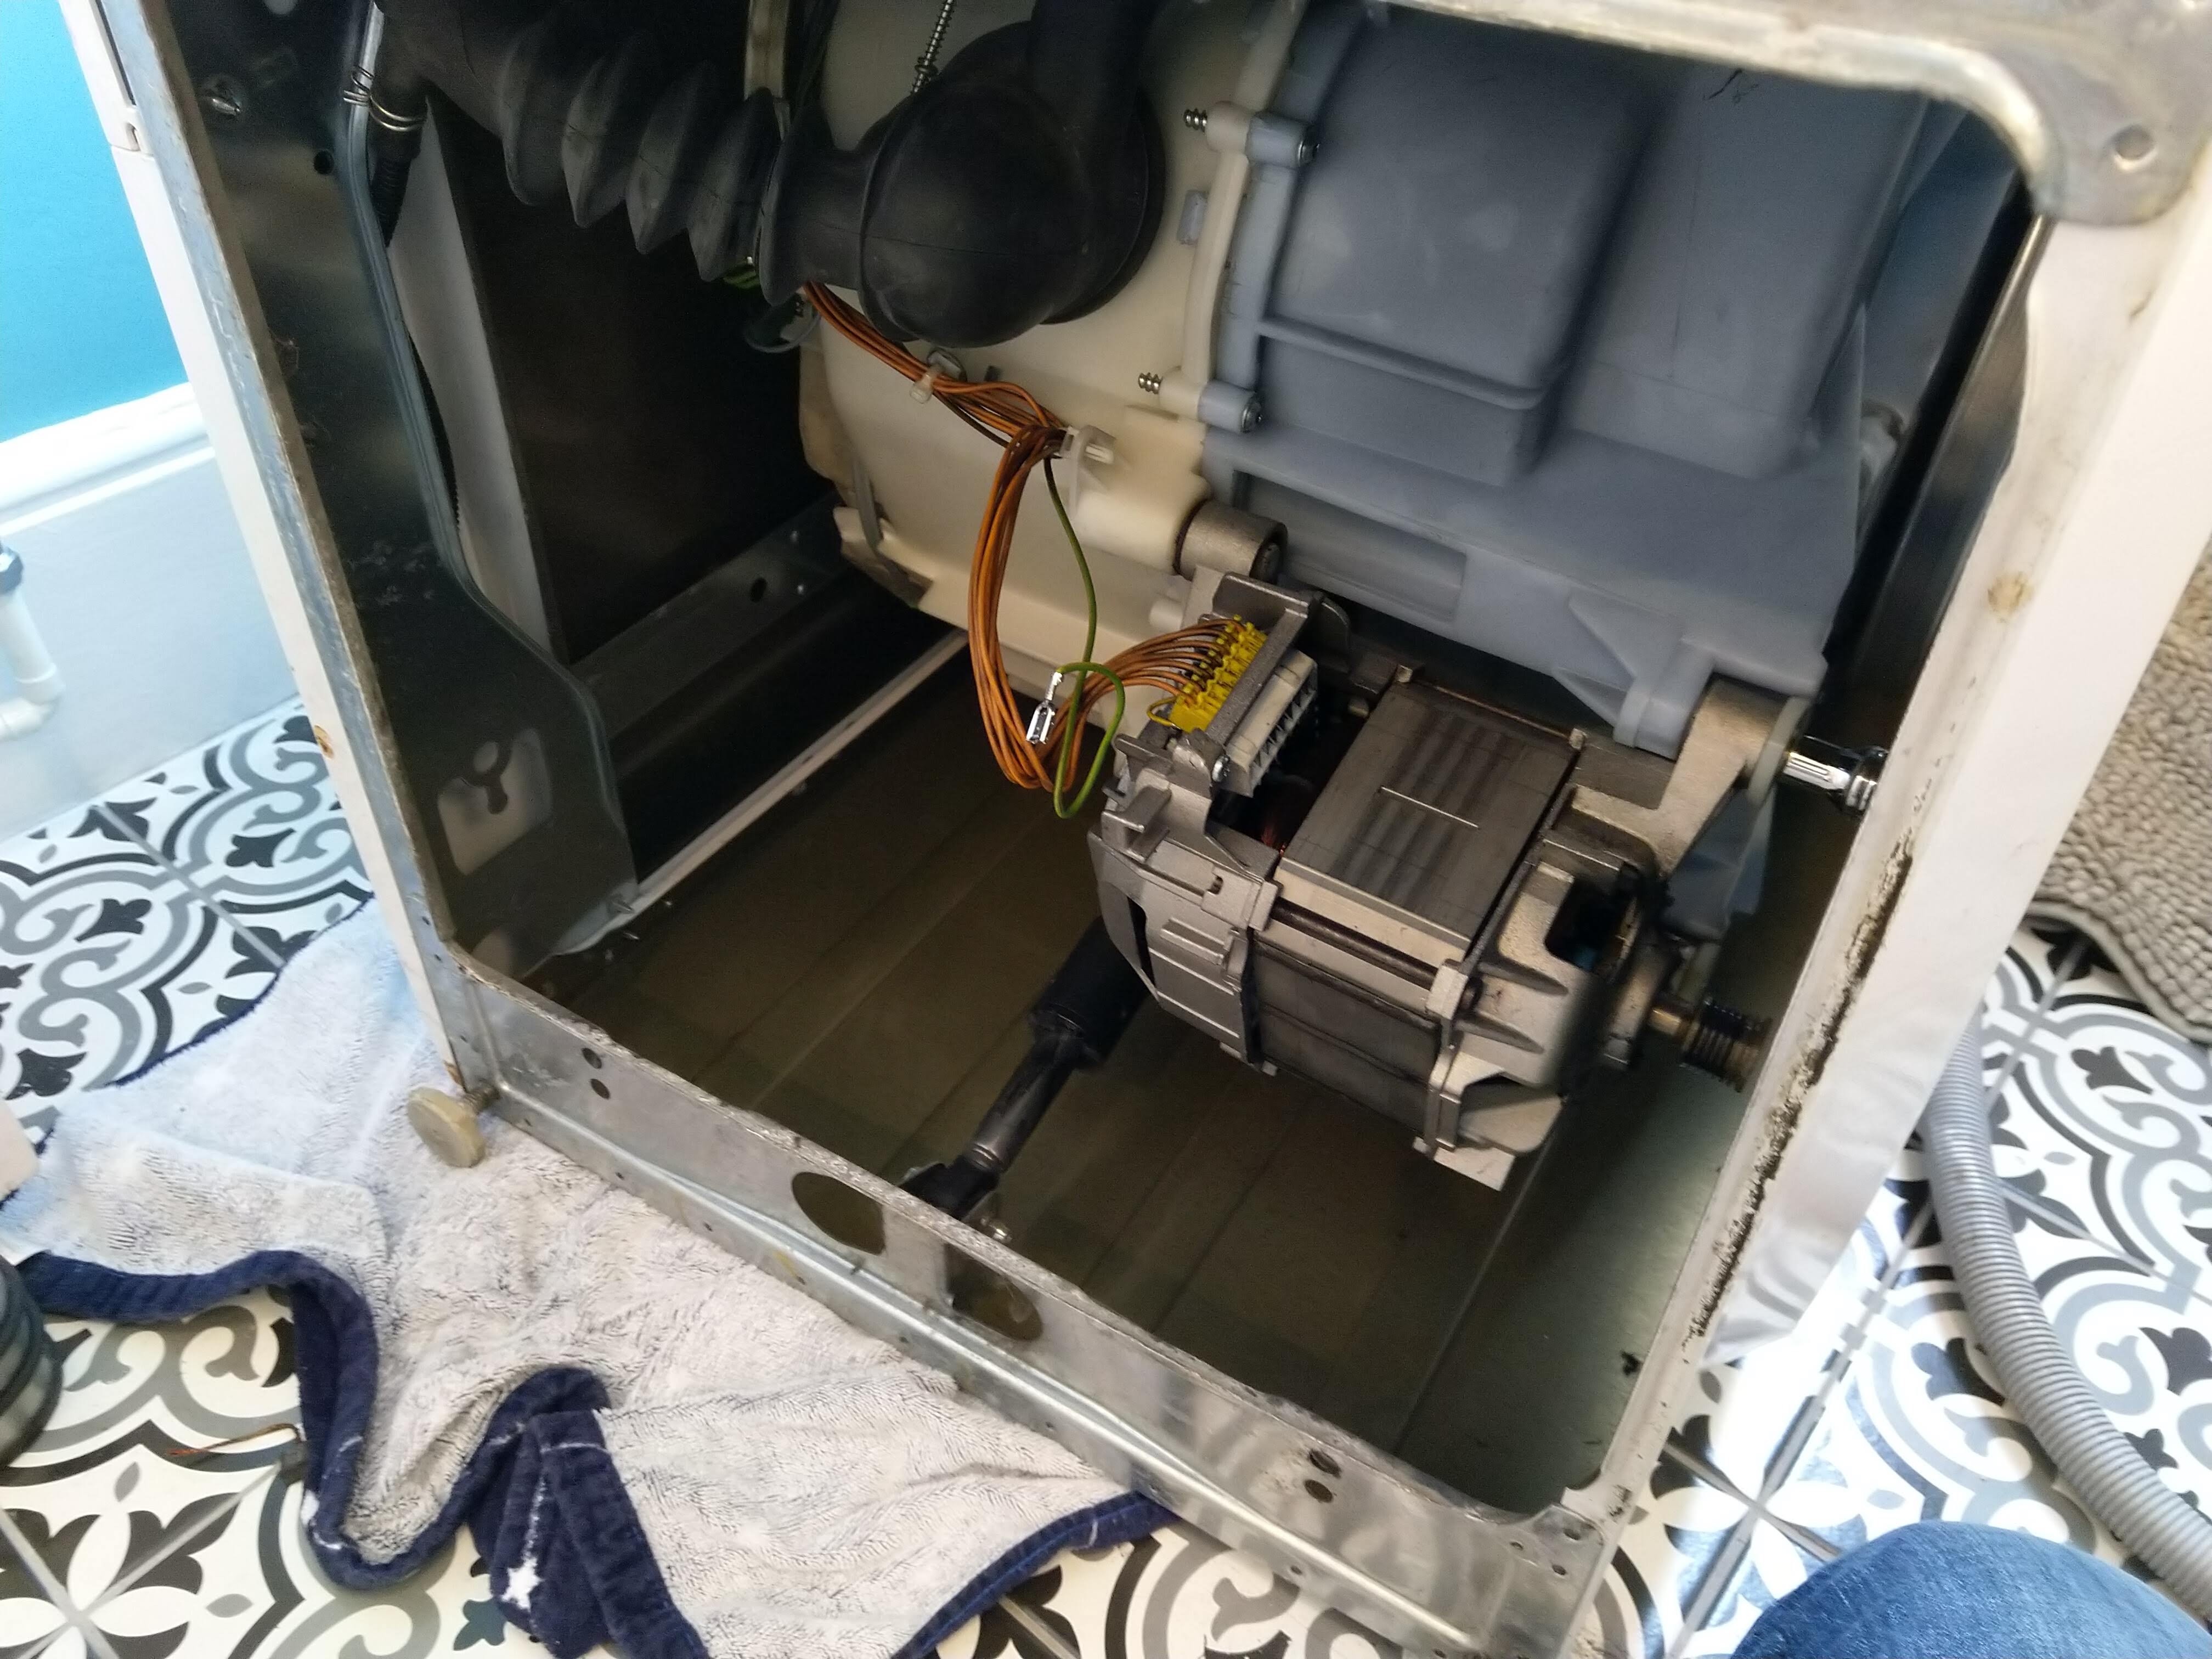
To get the motor out, you need to lever it off the lugs by using a big screwdriver to move it sideways and off the lugs. You need to be ready to catch the motor when it drops off, and it is heavy!
Once you have got the motor on the bench it is a good deal easier to work on the brushes. As per the last post, what you have to do is push the brush in first (ensuring the angled edge is the right way round), and then compress the spring and push it in, and then secure in with the locking tab.
I had to cut some metal off one of the tabs to make it fit properly, and even then it was difficult. On the other side, no matter what I did I just could not get the tab to fit in, whilst the original one seemed to fit fine. In desperation, I cut the tab off completely and soldered on the original one instead. This needed a lot of heat and solder, and it did make the wire rather less flexible. After a further struggle, I was finally able to get the brush with the soldered tab installed as well. On reflection I would have been better off returning them and getting some official parts but I didn’t really have the time to do this. I have had a moan at the supplier though, so we’ll see what happens next.
It was now just a case of putting everything back together again. It was very simple to reinstall the motor and wiring and bolt it into place. However, refitting the drive belt was not initally easy at all. The belt is pretty thick and stretching it over by hand was impossible (at least for my puny arms).
However, Youtube came to the rescue with this very useful video:
The winning tip here is to secure the belt to the drum pulley with a cable tie, and then turn the drum from the front of the machine by hand. This pulls the belt on to the pulley with minimum effort and worked first time!
So with everything back in place it was simply a job of switching on and testing. I had already cleared the fault codes so did not need to do this again, and much to my relief the motor immediately came to life. I can’t really say if it is any better than before, but it is definitely working and with new brushes should hopefully last another 9 years. Having had this experience I reckon I could also change the motor itself quite easily if I had to.
So a longer set of posts than usual, and although an apparently simple task I learned a lot. If you are attempting this these are my top tips:
- Use official parts (even though they are more expensive)
- Remove the motor before doing anything else
- Check carefully the orientation of the brushes before replacing them
Overall though a very satisfying result, and overcoming the struggles almost (but not quite) makes it worth having had the problem in the first place!

After many years of repairing appliances, especially washing machines, including solenoids, mechanical programmers, bearings and brushes, I feel your pain! – However the end result is very satisfying!
Much like yourself, I recently bought some replacement brushes for a Henry hoover and they do not fit. So others be warned, not all advertised “Direct Replacements” are the same design. (Note mine were in full metal carriers in the hoover and the (Newer) replacements are in a hard plastic carrier.)
Greetings and Regards,
John G 🙂