I’ve had a passing interest retro gaming for years, although it’s more about the tech than about actually playing the games (which I’m really not very good at). I have got a small collection of odds and ends, and one thing which I got more recently was a Gameboy Advance SP Zelda edition, rather like this one:

One of the nice things about these is that the play original Gameboy carts, and back in the 1980s there was nothing I wanted more than one of these. I fell in love with the accessibility and sheer playability of the games in (what seemed like) a small and compact package. I spent a lot of time with them after borrowing them from friends but never had my own.
I did start looking out in second hand shops for cartridges though, just to see what I could get my hands on. I found a couple of interesting ones, but the best was a Pokemon Silver cart:

It was just the bare cartridge and it worked fine, although it was clear straight away that there was a problem. These cartridges use an early form of ‘save game’ technology, done very simply by using battery backed RAM. At the time I remember this seemed like magic as the cartridges were identical to normal ones and there was no sign of the battery externally. However, after 20 or more years these batteries have unsurprisingly run out of life, and so whilst the game worked fine it didn’t save anything and you had to start again each time. Sometimes these old batteries leak and damage the actual electronics, I previously bought a Pokemon Red for which that had happened and the game simply wouldn’t start.
Fortunately as this is a common problem it was easy enough to find what I needed for repair. The cartridges are held together with a single ‘security’ screw which needs a special screwdriver, and these are easy to find on eBay etc:

They often come in sets with other sizes for different Nintendo products, eg SNES cartridges. Make sure you get one for the cartridge, the actual consoles use another type of special screw (a ‘triwing’) for which you can also buy screwdrivers. I have some of them too… another story!
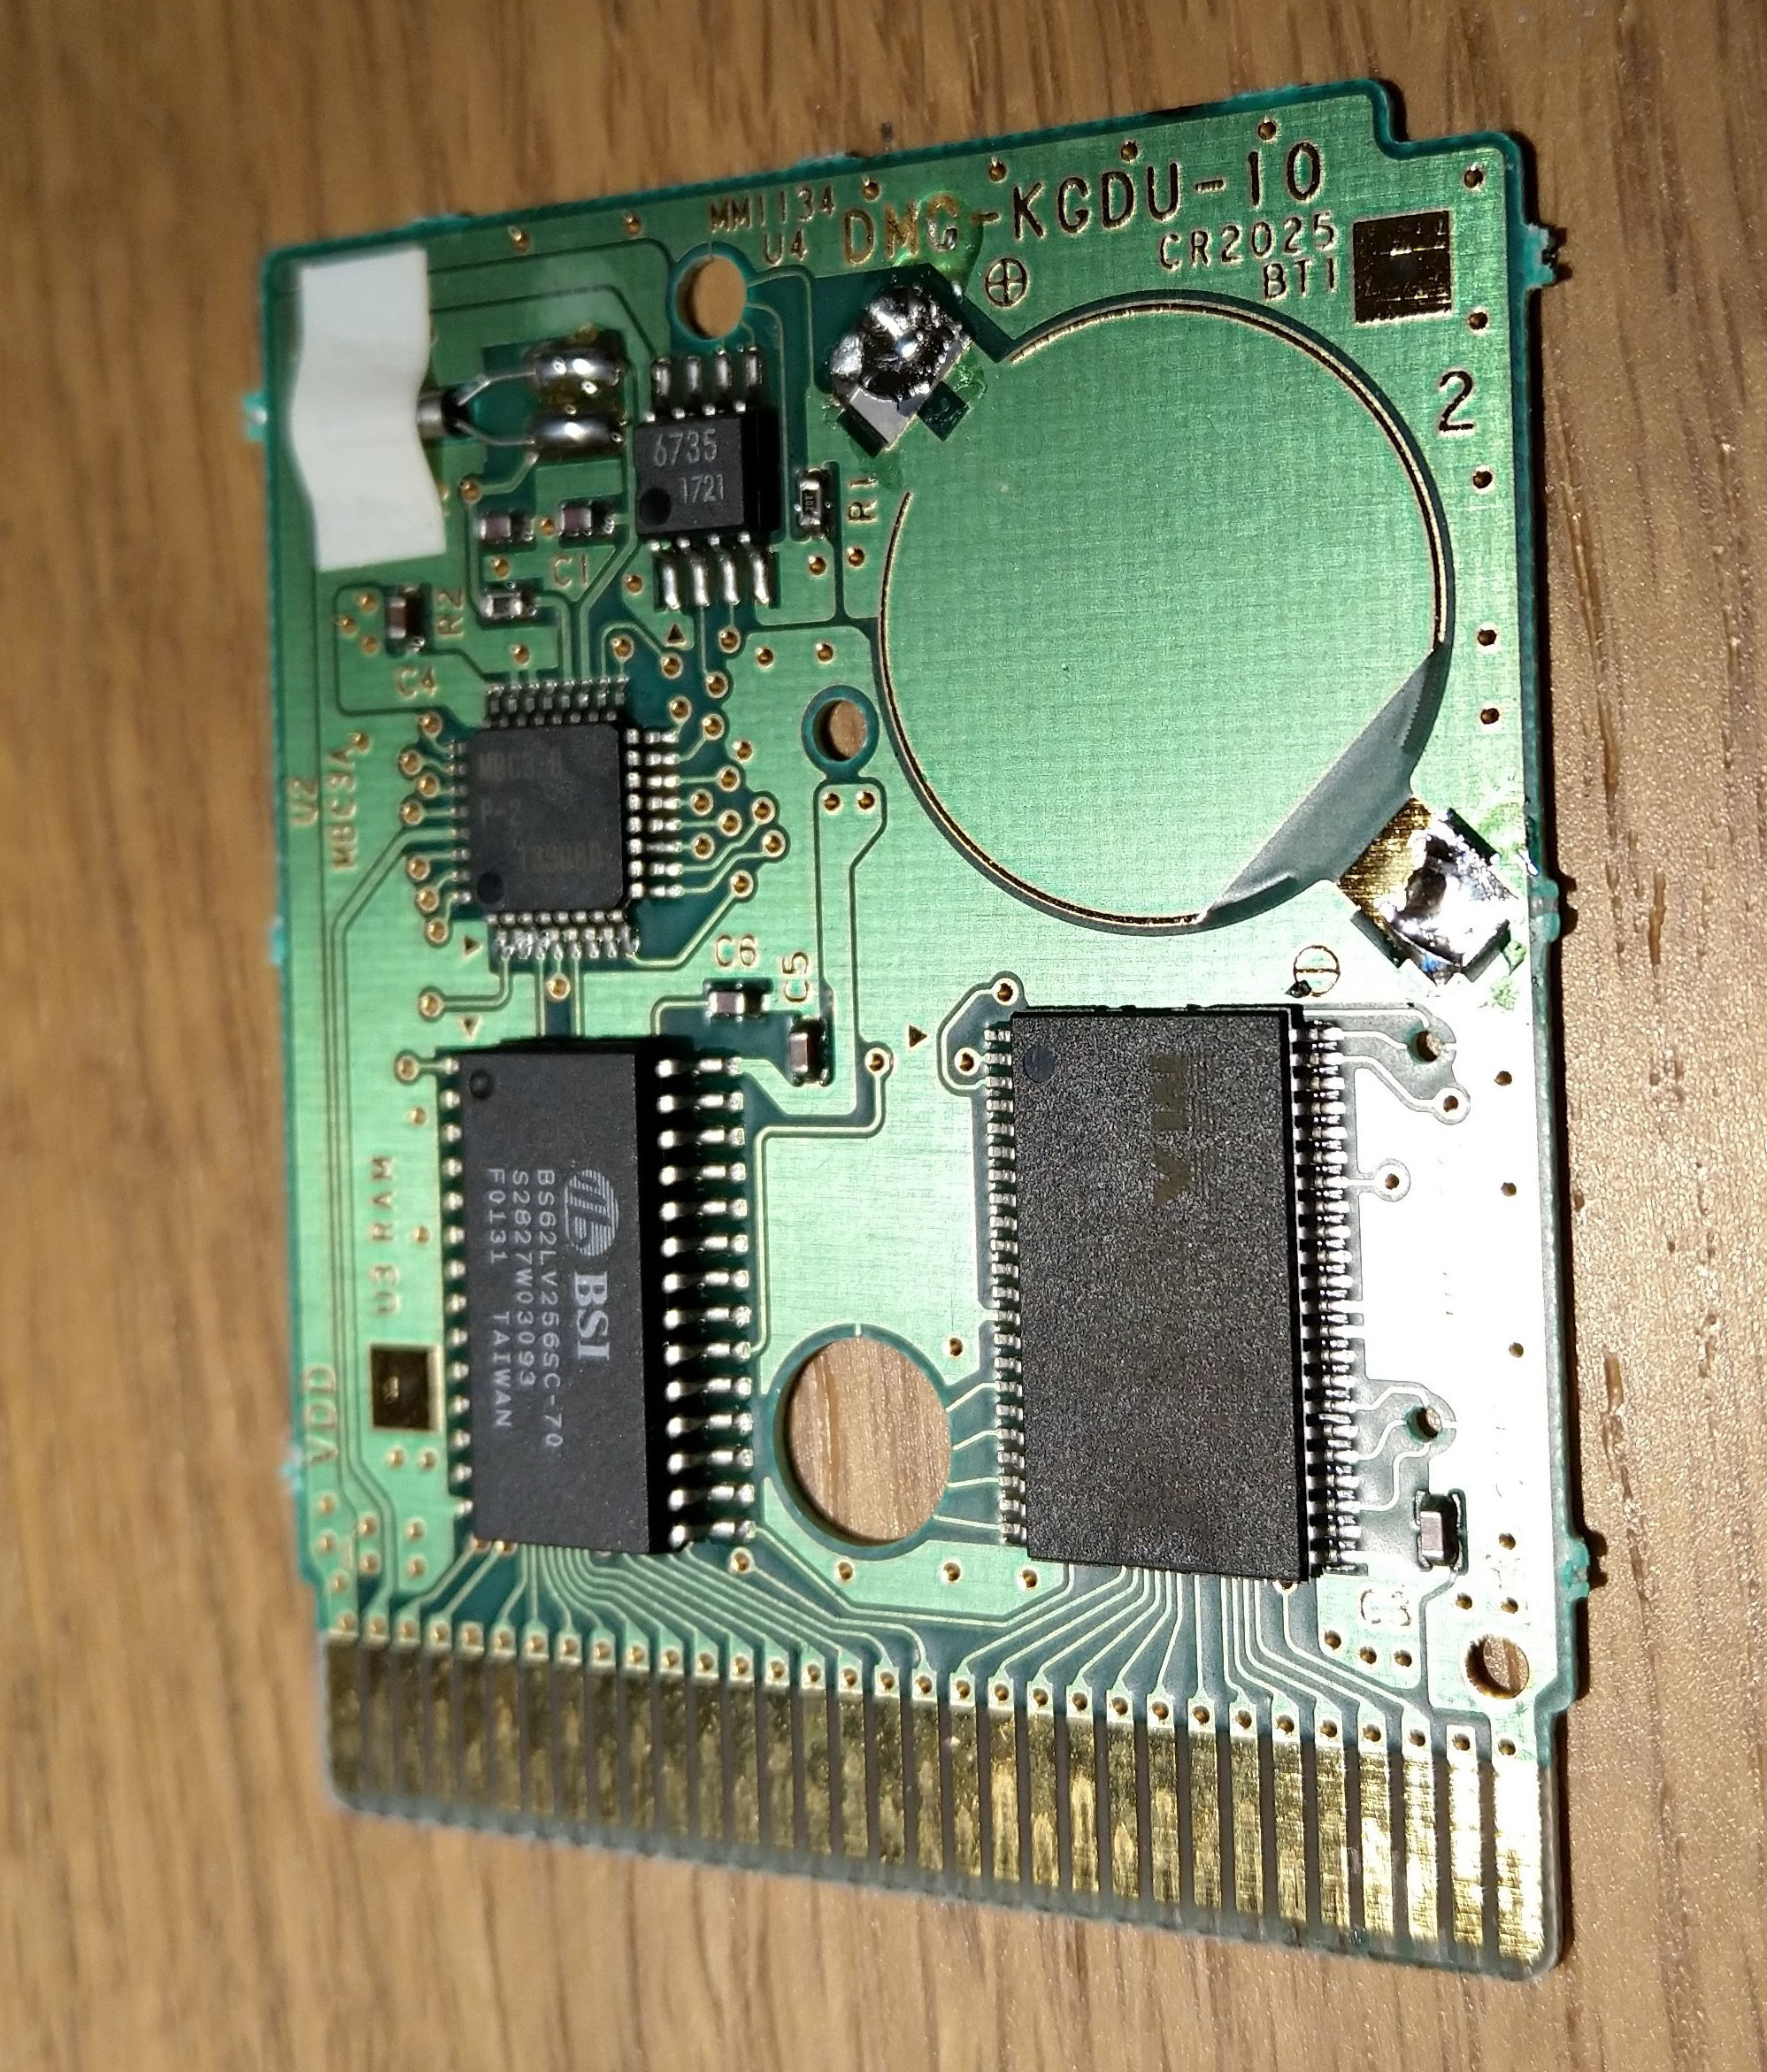
The other thing to do is make sure you have the right battery. There are at least two types (earlier games use a CR1616, later ones often the more common CR2025), and the easiest way to check is to open it up and have a look:

Printed on the board is the battery type (CR2025) and the date code shows it was made in January 2000 so shortly after the game was released. The battery is soldered in rather than socketed, so you do need to find a replacement with tags or else hack in a normal one. There are various suppliers on eBay and others who carry these so they are easy and cheap to find.
I took the opportunity to take the old battery off an clean the board up a bit. It’s in pretty good condition given its age:
Installing the new battery was pretty easy too, just a couple of blobs of solder, but as always make sure you get the polarity correct (in this case negative is the lower right and positive the upper left terminal). The replacement battery I had the contacts in a different place, so it looks different but the polarity is correct:

Then it’s just a matter of putting it back together and testing – which worked fine – so now it’s a question of actually getting on with the game!
