Since last posting things have moved on considerably and I have picked up quite a lot of new and interesting items. I’m going to go into these in more detail as we go but I’m going to start with a bit of curiosity.
One of my recent pickups has been a nice Atari 1040STE outfit. I’ve had a longstanding ‘relationship’ with the ST. It was the first 16 bit machine that I became aware of back in the 80s, and although later on I became more interested in the Amiga I never actually had either of them although I did borrow an ST for a time.
Looking back on it now, whilst I know the Amiga is superior technically I really like the industrial design of the ST which is I think is much sleeker and more interesting than the Amiga and especially the peripherals (mouse, monitors etc). So when it came to revisiting it all, I started with the ST again.
I didn’t mind too much which variant I got but after a bit of looking around I found a boxed 1040STE with various bits including several boxes of disks and a ‘Powerplay Cruiser‘ joystick. The STE is an enhanced (hence ‘E’) version of the original ST with a blitter, stereo sound and a few other refinements although from what I gather very few games supported this. It’s always a gamble when you buy tech like this but I was pleased to find that it was in good cosmetic condition and (surprisingly perhaps) in full working order including the disk drive.
Whilst it does have a TV modulator (and the picture was surprisingly good on my Trinitron TV) I wanted to connect it to a proper monitor, and one of my other pickups in recent times was a Philips CM8833-II monitor. So the first job was to get a suitable cable.
There are plenty of ebay traders selling ready-made cables although these are usually SCART rather than anything else, and I do quite like the ritual of making cables up. One sticking point is that for some reason the ST uses a lot of very odd connectors (including the notorious 19-way D type connector). The monitor is no exception and uses a very strange 13-way DIN connector with the pins arranged in almost a square pattern:

About the only other thing I know of which uses this is the equally obscure power connector on the Yamaha CX5-M MSX computer. I have an interest in these too and will talk about these in future, but a word of warning if you like these is never buy a CX5-M without a power supply because it’s quite difficult to make a replacement because of the connector and the need for various positive and negative voltages.
So if I wanted to make my own cable I’d need to source the connector. Fortunately they are not that hard to find on ebay these days, but on looking around I found something even better:
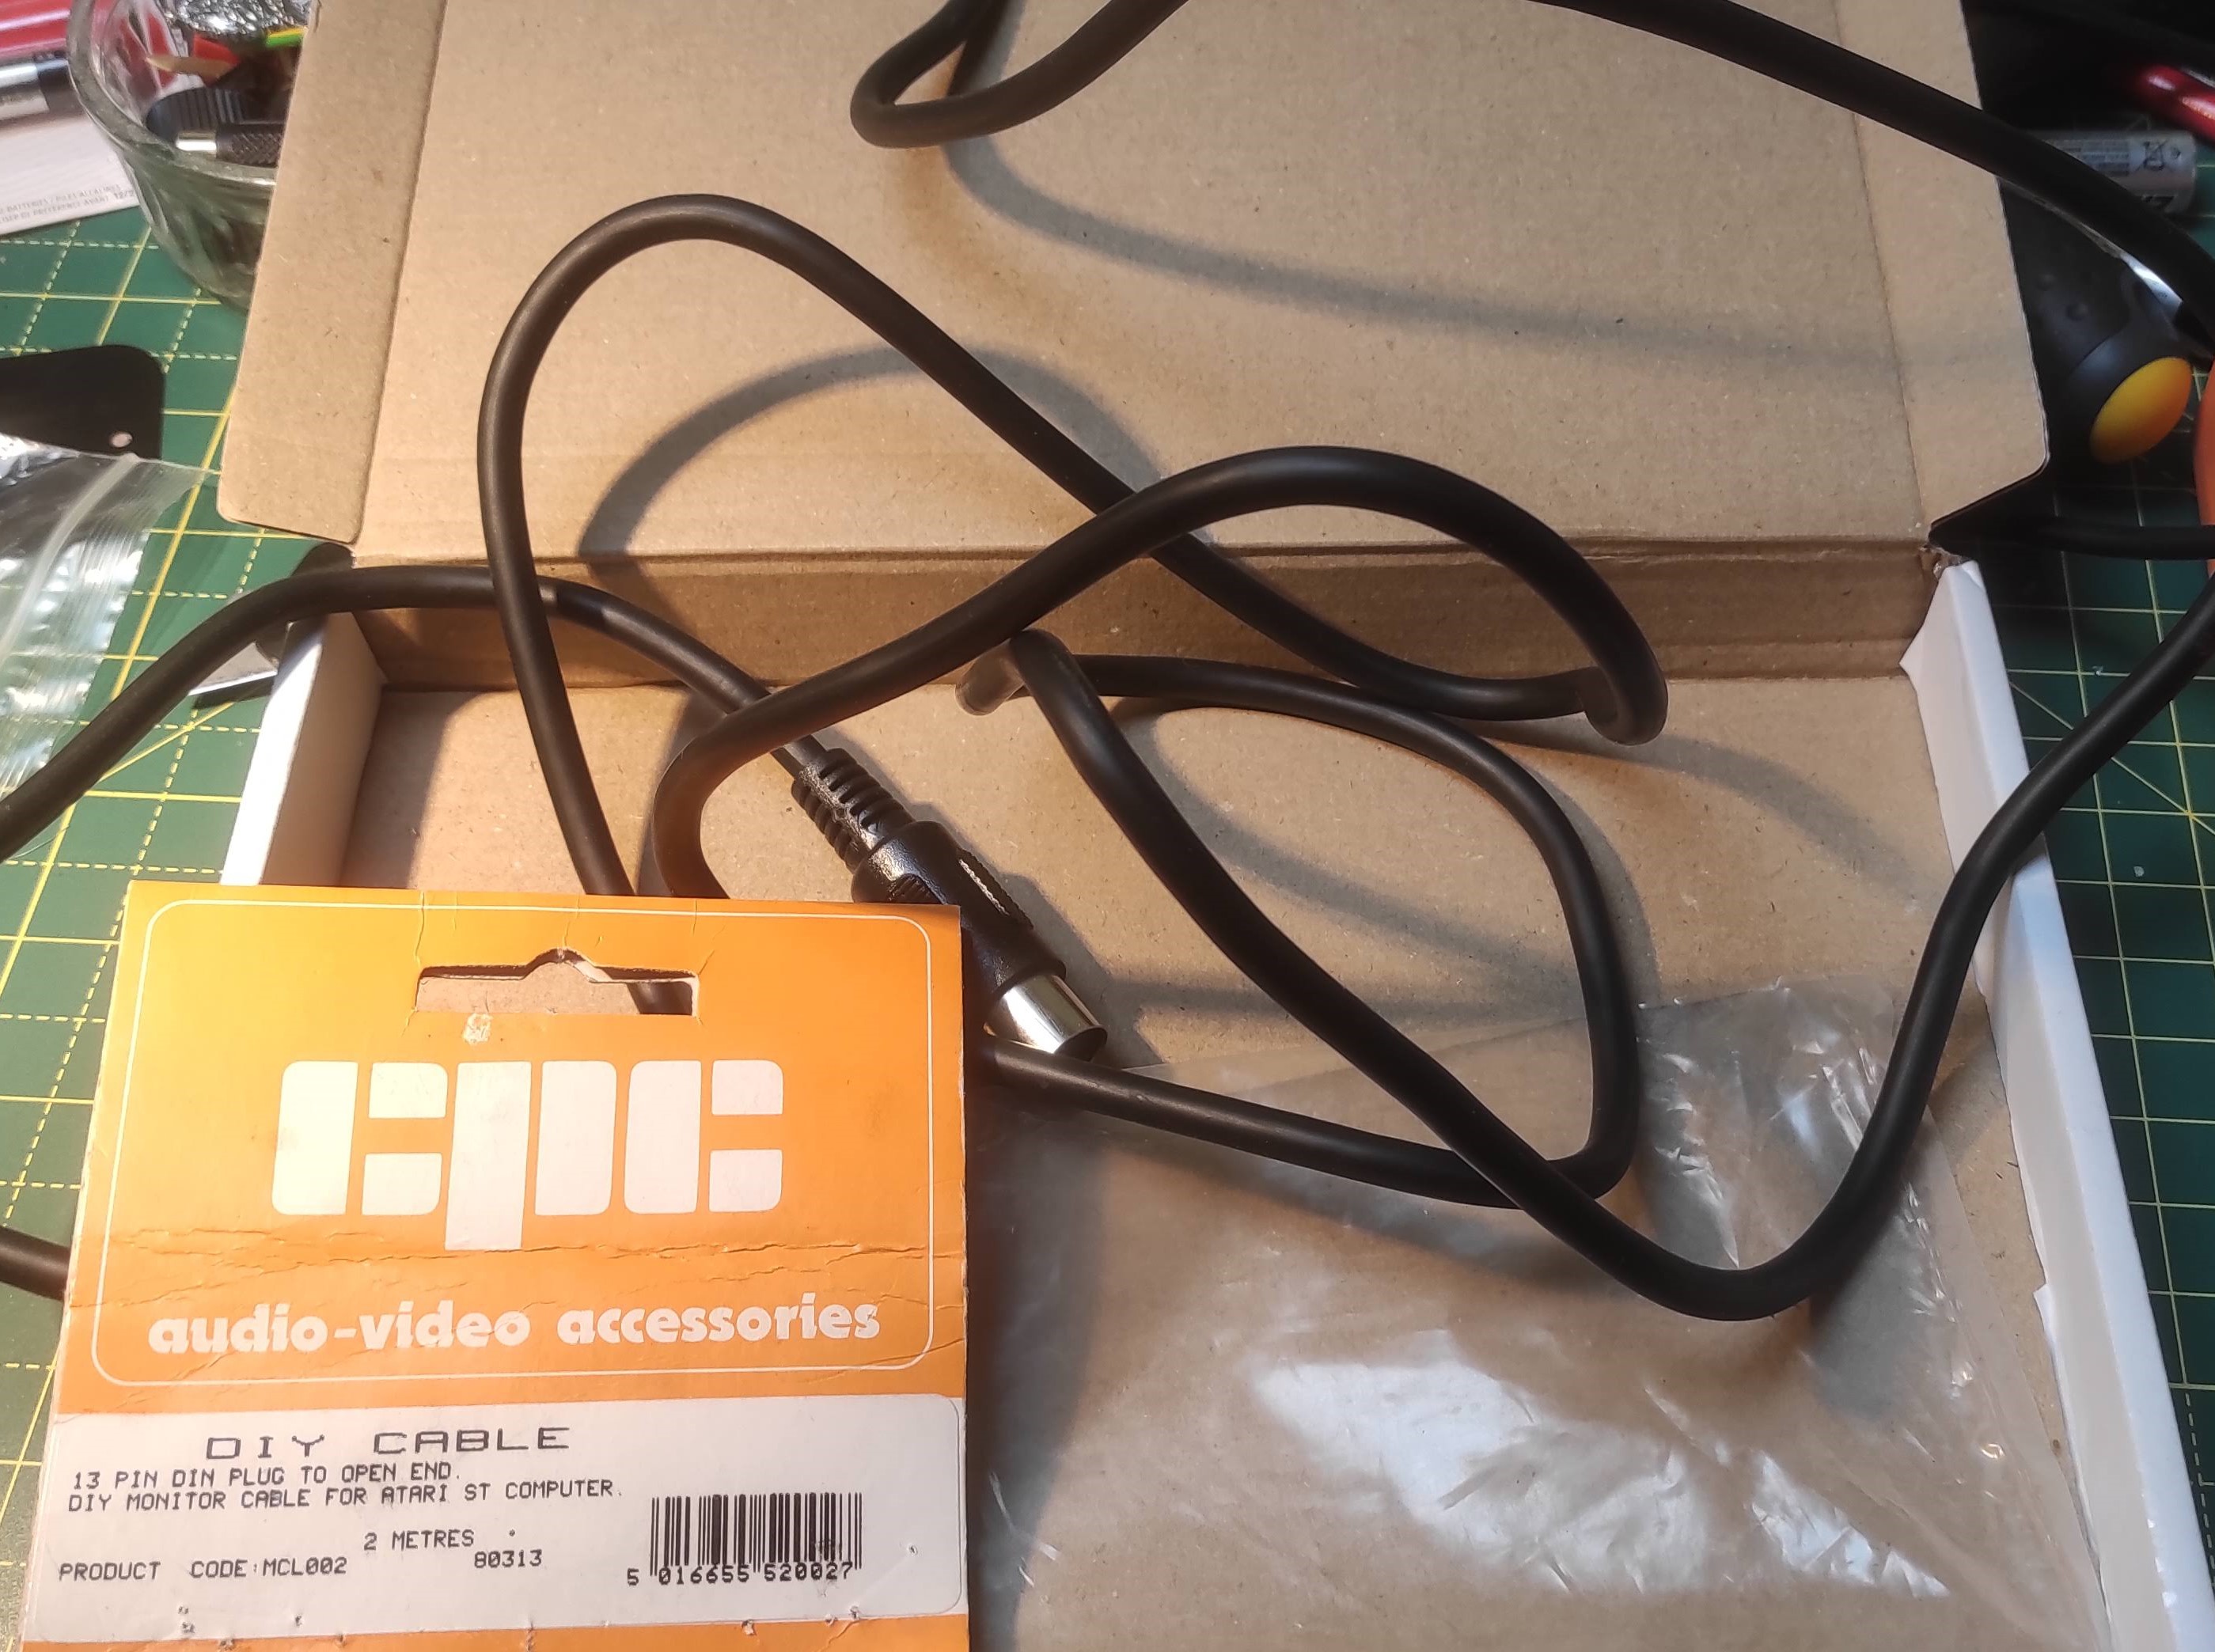
This is a ‘new old stock’ (‘NOS’) Atari ST monitor cable which was sold by CPC back in the 1980s. CPC is still around (as part of the mighty Farnell empire) and these days are a general electronics retailer (pretty good too, I’ve had a fair bit of stuff from them). However back in those days they specialised in spare parts for also sorts of consumer electronics, and I remember the catalogue which had complete parts lists for Sinclair, Amstrad and other computers. They obviously handled others too, and this cable was specifically sold as a ‘DIY’ with the 13 pin DIN on one end and pre-prepared stripped wires at the other end.
The pinout for the ST is widely available but here it is for convenience:
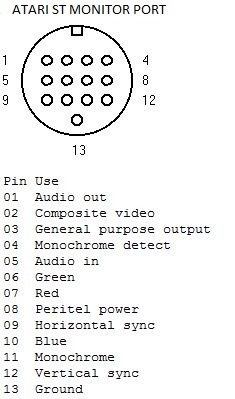
There’s actually quite a lot of interesting stuff on here which you don’t always find, including a pin 8 which is used for SCART switching, pin 01 which carries audio (but only in mono) and a choice of composite, mono or RGB video signals. There is also (oddly) an audio in on pin 5 but I’m not quite sure what you’d use that for.
The Philips CM8833 range have quite a choice of different connectors depending on the exact variant but the one I have uses a 9 pin D connector:

V & H on the above refers to vertical and horizontal sync. Although the monitor does have an internal amplifier and speakers, you can’t feed it from this connector but you have to use separate phono inputs instead. This is a pain and so you need to run a separate set of wires either from the back of the computer (which has L & R phono outputs) or you could possibly run one out of the D connector but this would be awkward.
The only thing left to do is work out which wire goes where. You would hope the colour coding would make some kind of sense but you can’t take it for granted. So in case any one else happens to find one of these cables (there do seem to be some more on ebay, perhaps someone is clearing out a workshop) here is what I found (function on the left, wire colour on the right):
| Function | Colour | Atari ST | 8833-II |
| Red (R) | Red | 7 | 3 |
| Green (G) | Light green | 6 | 4 |
| Blue (B) | Light blue | 10 | 5 |
| Horizontal sync | Black | 9 | 8 |
| Vertical sync | Yellow | 12 | 9 |
| Ground | Braid | 13 | 1 |
I had a few problems at first with getting the two sync wires the wrong way around but once I’d sorted that out it the picture looked great – really clear and bright and the famous ‘little green desktop’ look perfect.
I have a few ideas in mind for this – there’s an interesting project called ‘ACSI2STM‘ which emulates an ACSI hard drive using some low cost components. It does need a bit of hacking around (not least because of the limited availability of the 19 way D connector) but looks like fun. Meanwhile I’ve had a lot of other new toys in so more on those soon…
