So the next thing to do was the strip the unit down and look for the culprit. As stated above service manuals are readily available these days (I found mine here) and I was able to find the right one on archive.org. Service manuals are strange things – having seen quite a few now they are very variable in how much detail they give, and whilst obviously they are aimed at people who are supposed to know what they are doing the variation is quite puzzling. So this particular one is very helpful although does miss a few specific points which I’ll describe here.
The disassembly diagram shows a couple of ways to remove the mechanism – in view of the complexity of the device there are two separate circuit boards as well as the mechanism itself. You can either remove the main board, and then the mechanism, or else the whole ‘mechanism deck and main board block’ together. The latter of these is what you need to change the belts… but I didn’t realise this until too late and did the former. It doesn’t really matter but does mean removing more screws and connectors than you actually need.
Secondly and most importantly the manual does not tell you the whole story about the flexible ribbon cables of which there are two. The manual simply shows that they need to be removed (CN303):

So I just pulled them out, assuming that they were the variety that were held in by friction rather than any kind of locking mechanism. However, when I came to put it back together again I could not work out how to push them back in again. The cables were very floppy and despite a lot of effort I could not get them to engage in the sockets. I was beginning to get worried as I could see there was a high risk of damaging the cables and being left with a completely non-functional unit.
After a lot of messing around and getting nowhere I finally had an insight when I realised that the ends of the ribbons were completely floppy and not rigid at all – so were obviously designed to work with a locking connector. Looking closely at the connector I realised there were two black tabs, and these could be eased forward which released the clamp. Once this was done it was simple to slide the cable back in and close the clamps again. I really did have a lucky escape here, both when removing the cables and fruitlessly trying to push them in again. Other Sony service manuals clearly explain how the connectors work so it’s frustrating that this one did not do so.
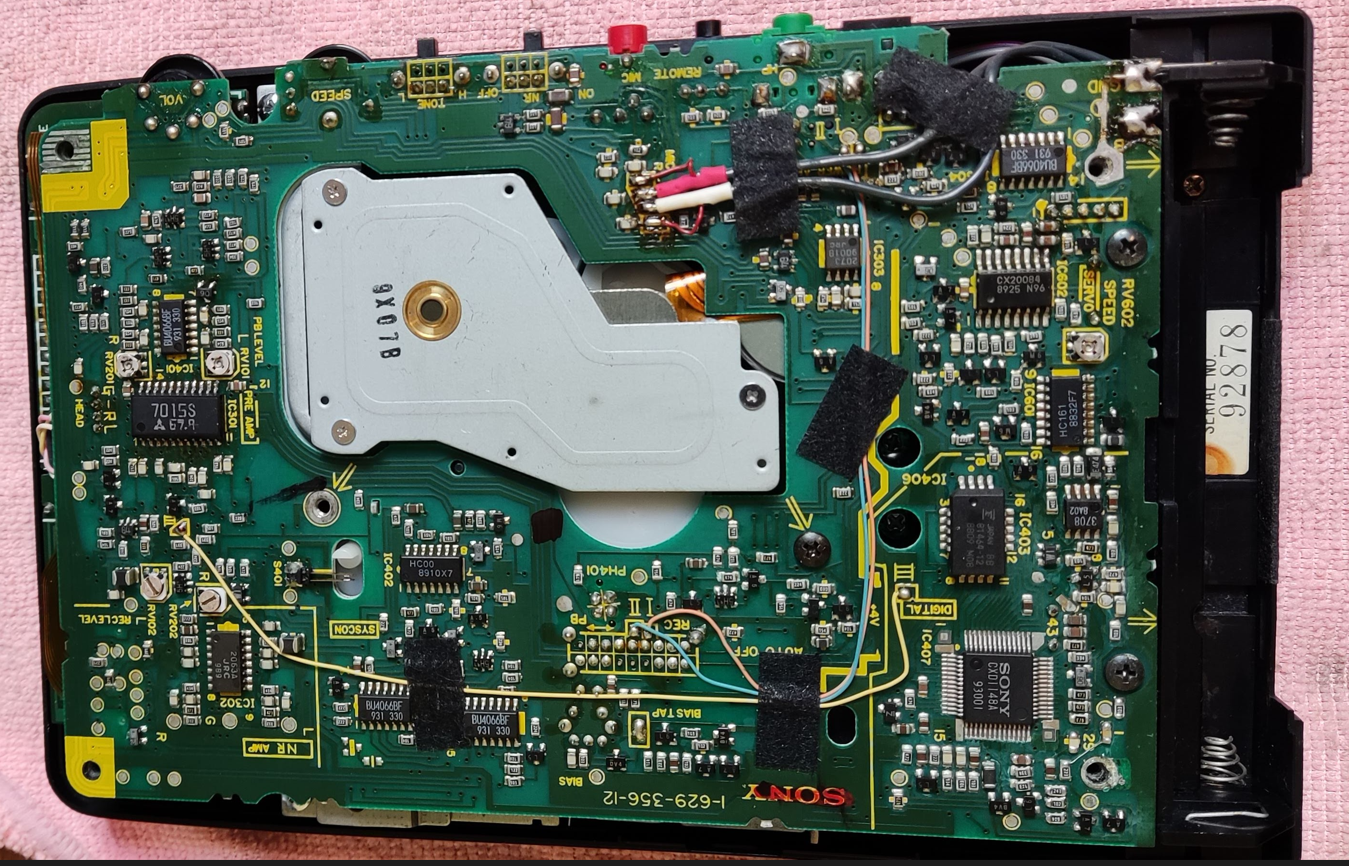
So I ended up with the ‘mechanism deck’ and the main board separated out which allowed me to get to the source of the problem.
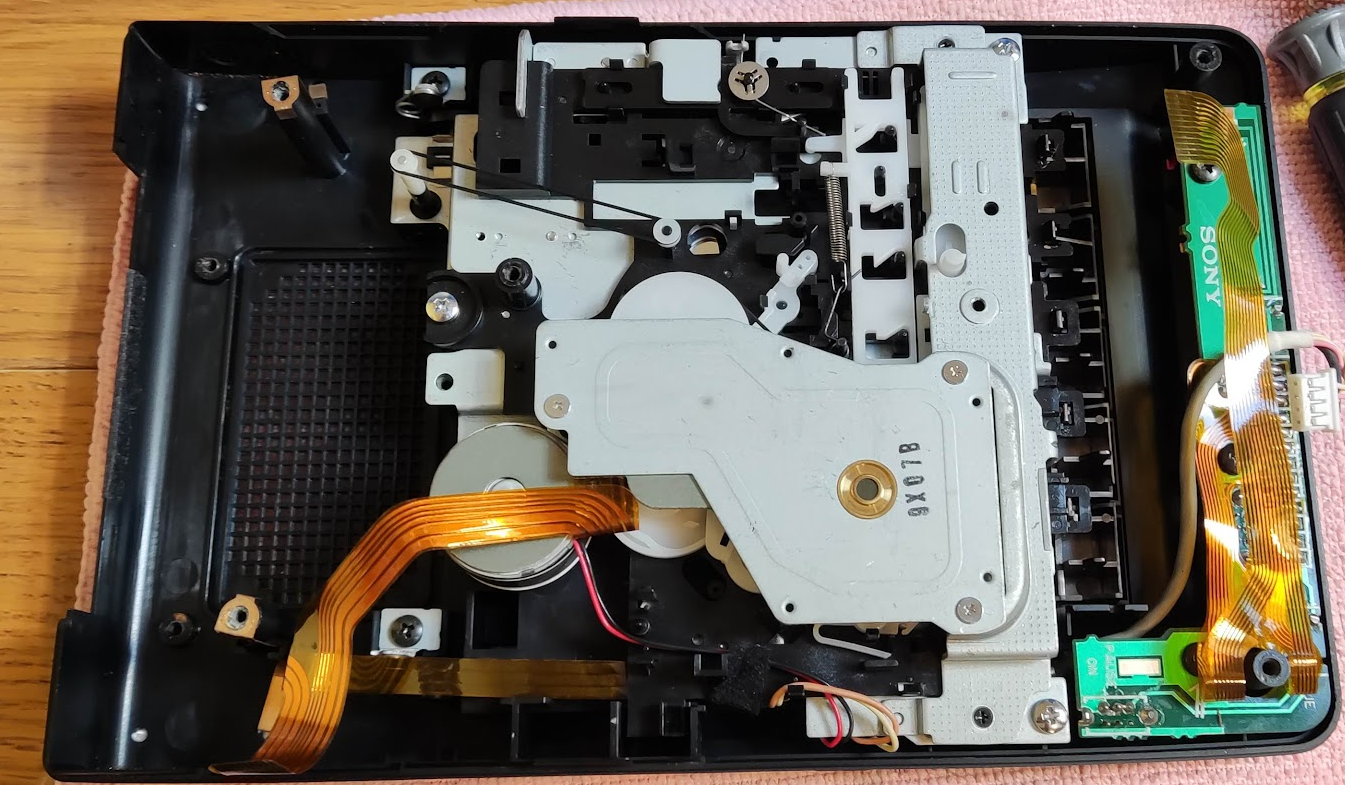
In all the excitement it seems that I did not get pictures of the crucial part of the mechanism, which lies under the large metal plate in the picture. You can see the floppy ribbon cables and hopefully appreciate how delicate they are.
The diagram in the service manual is quite helpful though:

It was apparent on getting a look at it that the belt ‘FR-A’ was extremely loose, and in fact had a very obvious flat spot on it where it had sat probably for 20 years. This flat spot accounted for the strange ‘pulsing’ effect I was getting. It was a simple matter to replace it with a suitable modern equivalent.
I had a good look at belt FR-B but it appeared springy and in good condition. Replacing it was a bit more involved, with the counter mechanism needing to be removed. I had a good look at this and did in fact remove everything but I didn’t have quite the right belt, and in any case it looked good.
So it was now simply a matter of putting it all back together again – as above this led to some nasty moments, but eventually I had it all together and on testing was pleased to find the fast winding in both directions worked smoothly.
So overall I’m very pleased with this item and with the result. I’d love to get it on a wow and flutter meter but I don’t have one (or the right tape) but there are apparently some ways of doing it on the computer that I’ll need to have a look at. Still I’m very happy to have a rare bit of Sony history to look after.
